Graphics in Flash
Applying a Mask in Flash
The ability to apply a mask in a Flash presentation is an essential Flash skill. All a mask does is hide or reveal parts of the Flash Stage. In many respects, masks are similar to stencils. You can see through the part that is transparent, and the part that isn’t hides everything under it. Masks can be stationary or animated. There are many stunning Flash sites that actually use both techniques.
Masks are created by converting a layer of the Timeline to a Mask layer.The object on the Mask layer becomes the hole in the stencil, and any objects on layers below the mask that are linked to it are hidden.
In this exercise, you create both a stationary mask and an animated mask.
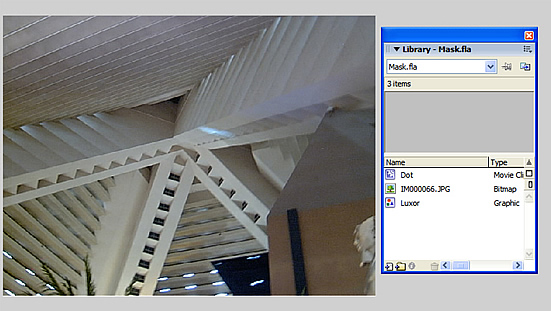
- Open the Mask.fla file in your Lesson 3 Exercise folder.
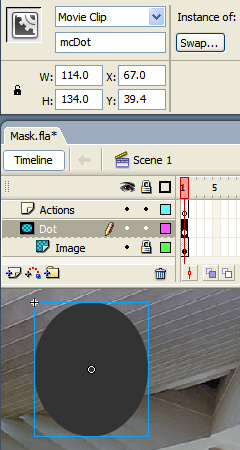
When the file opens, you will see an image of the ceiling architecture for the Luxor Hotel in Las Vegas; in the library, you will see the image, the graphic symbol used for the image on the Stage, and a movie clip named Dot.
The movie clip will be used as the mask; when applied, you will only see the part of the underlying image that is directly under the Dot movie clip.
- Add a new layer and drag the Dot movie clip from the library to this new layer.
To create the masking layer, simply right-click (PC) or Control-click (Mac) the layer containing the Dot movie clip and select Mask from the drop-down list.
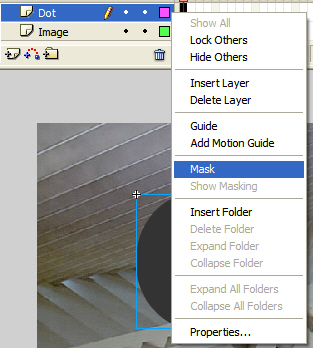
When you release the mouse, the mask is applied, and only the area of the image under the dot shows through.
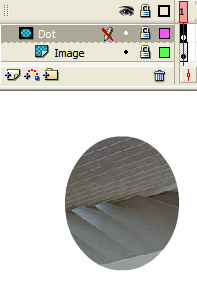
The layers also change. The layer used for the mask will change color, get a new icon, and be locked. The layer containing the object being masked also changes. The name is indented to indicate that it is linked to the mask in the layer above it, and the layer is locked as well.
To release the mask and move it to another location on the Stage, click the Lock icon in the Mask layer. Drag the Dot movie clip to a new location and click the Lock icon on the Mask layer to lock the layer and reapply the mask.
Masks don’t have to be stationary; they can also be interactive.
- Add a new layer named Actions.
In this exercise, you will move the dot around the screen while the movie is playing. When you have an object that will be both moveable and a mask, that object must be a movie clip.
To start, unlock the Mask layer and select the dot on the Stage. Give it the instance name of mcDot in the Property inspector and then relock the Mask layer.
- Select the Actions layer and open the Actions panel by selecting Window > Actions.
The ActionScript you will write is fairly simple. The ability to click and drag an object while a movie is playing is due to a startDrag() function tied to a mouse event which, in this case, will be the mouse button being held down. When the mouse is released, the mask is no longer able to be dragged due to a stopDrag() function.
Click once in the Script pane and add the following code:
mcDot.onPress = function() {
this.startDrag();
}
mcDot.onRelease = function () {
this.stopDrag();
}
There are two functions that depend on whether the mouse is being held down (onPress) over the movie clip or whether the mouse is released (onRelease). When the mouse is pressed the startDrag() function is applied to the movie clip (this) that has been clicked. The opposite function—stopDrag()—is applied when you let go of the mouse.
- Save the movie and press Ctrl+Enter (PC) or Cmd+Return (Mac) to test the movie.
When you place the cursor over the mask, it changes to indicate that the object can be dragged or clicked. Drag the mask around the picture.
 This work is licensed under a Creative Commons License.