Week 10: Masking a Video
A few months ago I was speaking at Thunder Lizard's Digital Design World Conference in Seattle. The subject was Video in Flash and I showed a number of the video projects I had undertaken here and elsewhere. A couple of days later I received an email from one of the attendees. The subject was "How did they do that"?
This individual had visited the presentation Vodafone had done to present its vision of wireless communication in the future.( Check out the presentation here. )
Specifically, this individual had visited the "Entertaining" section of the presentation and was seriously impressed with the "Video in the Visual Bracelet". The question was: "How did they get the video into the bracelet? Must have been a lot of Photoshop work?"
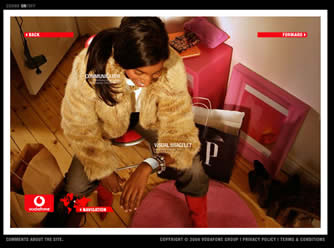
Image 1: The Vodafone Visual Bracelet.
First off, This is not how Vodafone did it. They aren't telling. Instead this is a "How to do it" using the tools in the Studio. Secondly, there might have been some Photoshop work done by Vodafone but it is so much easier when your workflow starts in Fireworks MX 2004, moves to Flash and then to Dreamweaver MX 2004 for upload. In fact, the whole process should take no more than 30 minutes.
Planning the project
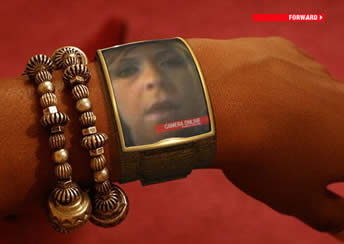
Image 2: The video that plays in Vodafone's Visual Bracelet.
When you study the video a couple of things become abundantly clear:
-
The Flash Video is "visible" through the bracelet's screen.
-
The video loads real fast and plays almost immediately.
-
The only "active area in the screen is the video.
Those three aspects actually determine your workflow.
The video is visible through the bracelet's screen because it is sitting under the screen. This tells me that I will need to create the screen in Fireworks, convert it to a Graphic Symbol in Flash and then apply "Opacity" to the symbol.
The reason the video plays so quickly is that it isn't embedded into the Flash .swf file. The video streams into the .swf from the server. This means I need to create a video object, in Flash, which essentially makes a call to load the video file and starts to play almost immediately.
Finally, the only active area is the video because it is actually sitting under the image of the arm with the bracelet. From this, I determine that I need to cut the screen out of the image in Fireworks. Not only that, the Fireworks canvas needs to be transparent and the image saved as .png file. In this nammer, the video will "show through" the image and appear to be the only active area in the screen.
You simply can't "slap" the video object over the arm and then mask it using a Masking layer in Flash. Though I covered this technique in Masking Flash Video , in this case, the video will "leak" out of the sides of the mask. The reason is that I intend to use one of the Flash Professional Media Components and it, for some reason, doesn't want to "play nice" with a mask. The other reason is an inability to "bend" the component to fit the aspect area of the bracelet's screen. The best you can expect is to do a bit of sizing and "shearing" of the component to make it fit. Faced with this, I felt it better to simply cut a hole in the image and let it cover the video
If you want to follow this tutorial, download the files and place the video file named "crockard.flv" in the directory you will be uploading to your site. You don't have to use the video I have included. If you have an .FLV file you would prefer to use, move it to your directory.
Creating the assets in Fireworks MX 2004
The first thing I did was to play the Vodafone presentation a couple of times to determine the best "shot" of the bracelet without a video playing in it. I then took a screen shot and opened the resulting .jpg image in Fireworks MX 2004.

Image 3: The screen shot is placed in Fireworks MX 2004.
1. Select the Magnifying Glass tool and zoom in on the screen.
2. Switch to the Lasso Tool by pressing the "L" key and roughly select the screen area.
3. Using the Alt- Click-Drag (PC) or Option-Click-Drag (Mac) technique to shrink the selection, remove the selections that go outside of the screen. Use Shift-Click-Drag (Mac and PC) to add areas that are inside the screen. When finished your selection should resemble Image 4.
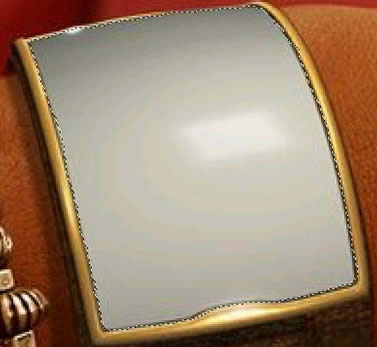
Image 4: The screen area is selected.
4. Cut the selection out of the image by selecting Edit>Cut or pressing Control-X (PC) or Command-X (Mac). The selection will disappear and the checkerboard canvas, indicating transparency, will be visible.
5. Select Edit>Paste and the screen will appear on the image only in its own layer as shown in Image 5. Name the layers by double clicking on the name in the layer panel and entering the new name. Also select the background layer and note the Width and Height of the image in the Property Inspector. In my case it was 692 x 457.

6. Save the image as Vodafone.png by selecting File>Save As. Leave the Fireworks image open because I am going to show you a rather cool "trick" in a minute.
Building the Vodafone video project in Flash MX 2004
1. Download the file used in the Tutorial.
2. Create a folder named Vodafone on your hard drive and move .FLV file named "crockard.flv" from the Exercise folder to the Vodafone folder.
3. Open the Flash file named VF3 in the Exercise folder. The assets are in place and you will note there are blank key frames in the Actions and Video Layers.

Image 6. The objects are in their layers .
3. If it isn't open, open the Library by selecting Window>Library or pressing Control-L (PC) or Command-L (Mac).
4. Click the Library Options button to open the Library Options menu. Select New Video. A new symbol named "Embedded Video 1, appears in your Library.

Image 7. Selecting New Video adds an Embedded Video symbol to the library
5. Select the key frame in Frame one of the Video layer. Drag an instance of the Embedded Video file from the library on to the stage.
6. With the video instance selected- it looks like a box with a big "X" through it- click once in the Instance name area of the Property inspector and name the video instance "my_video".

Image 8: The video instance is added to the stage and named "my_vid"
7. Select the Free Transform Tool and, using a combination of Shear, Scale and Rotation, distort the video instance to roughly match the display area of the Bracelet.
The white dot in the center of the object being manipulated by the Free Transform Tool is its registration point. All transformations apply from that location. Click and drag the dot to various points on the selection area to get the shape you need.
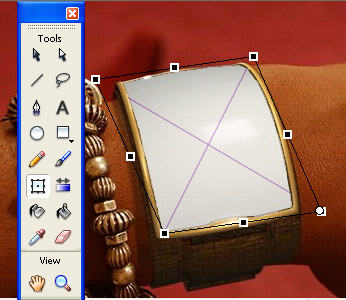
Image 9: The Video image is distorted using the Free Transform Tool.
8. Save the file.
Adding the code
1. Select the Key Frame in the Actions Layer and press the F9 key to open the Actionscript Editor. You can also open the editor by selecting Window>Development Panels>Actions.
2. When the editor opens click once in line one and enter the following code:
var netConn:NetConnection = new NetConnection();
netConn.connect(null);
var netStream:NetStream= new NetStream (netConn);
my_video.attachVideo (netStream);
netStream.play("crockard.flv");
This code follows the order presented earlier when I talked about what you need to know about video. let's go through each line to see how it works:
var netConn:NetConnection = new NetConnection();
-
Create a NetConnection object by creating a variable named "netConn" for the NetConnection class and have this variable- "netConn"- open up a new NetConnection.
netConn.connect(null);
-
This new NetConnection opens a local connection - connect (null) - through which you can play back an FLV from your hard drive or HTTP address.
var netStream:NetStream= new NetStream (netConn);
-
Create a a netStream object by creating a variable named "netStream" for the NetStream class and have this netStream communicate with the NetConnection to the HTTP address or your hard drive.
my_video.attachVideo (netStream);
-
The netStream video is fed into the video instance on the stage.
netStream.play("crockard.flv");
-
Play the .FLV file named "crockard.flv" in the video instance.
It really makes sense when you look at it. Open a connection- NetConnection- establish a stream- Net Stream- send the stream to video object on the stage- my_Video.attachVideo- and start playing the named FLV file - netstream.play("File name").
3. Save the file.
4. Publish the .swf and, if you wish, the HTML- File>Publish Settings- to the Vodafone folder you created earlier.
5. Quit Flash and upload the folder to your web site.
If everything went according to plan your final project should look like this when viewed through the browser.

Image 10: The final project viewed through a browser.
Conclusion:
Just because the "Cool Kids" get to use Flash MX Professional 2004 is no reason for the rest of us to not take advantage of the video tools in Flash MX 2004. All you need to to know is how "Progressive Downloading" works and the Actionscript that makes it happen.
Those five simple lines of code now put video and all of its creative possibilities in your hands as well. Now it is our turn to show the "Cool Kids" they aren't the only ones that can have fun with Video in Flash.
![]()
