Week 6: Programmatic Sound Control ... Part Two
In this exercise, based on a tutorial developed by Derek Frankin in Actionscript: Training from the source, we use the mouse to to control the sound of a bouncing basketball. As you move the move toward the top of the image, the sound gets fainter and, as you drag the bouncing ball to the from of the image, the sound gets louder. Dragging the ball from side to side, pans the sound.
The interesting aspect of this tutoial is that the sound being manipulated is attached to the bouncing ball.
Getting Started
- Download the exercise, unzip it and open the Lesson_6.fla file in the Exercise folder.
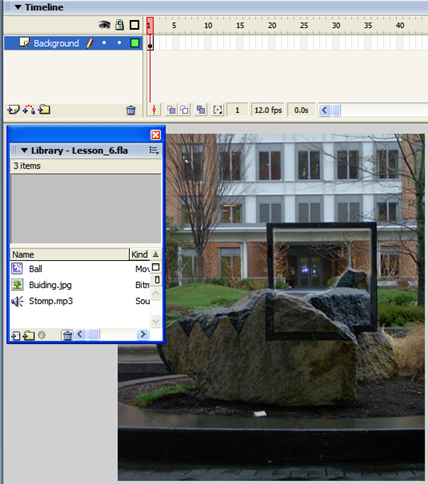
Image 1: The download includes three items and the building image in the Library is already on the stage.
- Add two layers to the main timeline and name them, Ball and Actions.
- Create a new Movie Clip symbol named "BallBounce".
- Save the file to your folder.
Creating the bouncing ball
We now have to create the bouncing ball. The hallmark of a good Flash designer is the attention to the small details. When a ball bounces the sound is made when it hits the floor. As well, there is usually a shadow under the ball that shrinks as the ball approaches the floor and, when the ball hits the floor it distorts. In animation this distortion is called a "squash". The great thing about this whole animation is that it can be contained a movie clip that has,maybe, 10 frames. Here's how:
- Open the "BallBounce" movie clip.
- Add two layers to the movieclip and name the layers:
- Sound
- Ball
- Shadow
- Drag a copy of the "Ball" symbol to frame one of the "Ball" Layer.
- Select the the ball and, in the Property Inspector,set its "X" coordinate to -18 and the "Y" coordinate to -20.
- Select the oval tool and draw a small oval shaped filled with black and no stroke. Covert this object to a Graphic symbol named "Shadow."
- Select the shadow on the stage and click once on the Transform tool .
- Drag the handles so the size of the oval roughly matches the width of the ball.
- With the shadow still selected, reduce the Alpha of the shadow to 19%. It will look grey.
- Add key frames in Frames 5 and 10 of the Sound, Ball and Shadow Layers.
- Select the Ball in frame 5 and, pressing the Down arrow key move the ball untl it is over or alst covers the shadow.
- Select the Transform tool and streatch the ball slightly outward.
- Select the Shadow and shrink it so the ball just covers it.
- Ad Motion tween s between frames 1 and 5 and frames 5 and 10 on the Ball and shadow layers. If you "scrub" the playback head you will see the ball hit the floor and "squash" and as it approaches the shadow, the shadow shrinks.
- Select the keyframe in Frame 5 of the Sound layer and drag the "Stomp.mp3" file onto the stage.
- Select Control>Loop Playback and press the Enter /return key. The ball will bounce and the sound will start when the ball hits the floor. Notice,too, how the ball "squashes" and the shadow shrinks.
- Save the file.
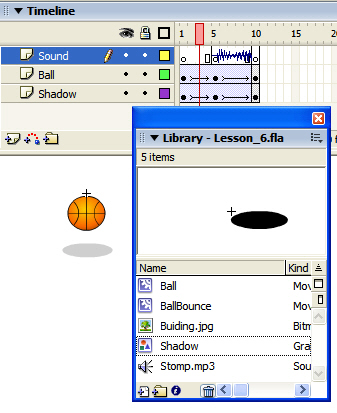
Image 2: The animation looks more realistic when the ball distorts and the sound plays when the ball hits the floor.
Wiring up interactive sound
Now that the bouncing ball has been created we can now concentrate on the other half of this project. Making it realistic. For example, it only makes sense that an object that moves farther away from you will shrink in size and the sound it makes will grow fainter. When it moves toward you, the opposite it true.
This can all be accomplished through the use of Actionscript. The plan is:
-
Constrain the bouncing ball movie clip to a defined area.
-
Scale the movie clip to a small size as it moves closer to the top boundary on the constrain area.
-
Scale the movie clip to regular size as it moves toward the bottom of the contraining area.
-
Reduce the volume of the bouncing sound as it approaches the top of the constarining area.
-
Increase the volume of the sound as it moves to the bottom of the constraining area.
-
As the ball moves fom left to right the pan amount reflects this move
Now that you know the plan, here's how to pull it all together.
- Draw a square in the Ball Layer. This will be the area in which the ball will move.
- Write down the coordinates of the top,bottom and two sides of the box.
- Delete the box.
- Select frame 1 in the ball layer and drag a copy of the "BallBounce" movie clip on to the stage.Give the instance name of "ball_mc"
- Select the actions layer, add a key frame and open the Actionscript Editor.
- Enter the following code:
var bounce: Sound = new Sound(bounce_mc);
var leftSide:Number = 38;
var rightSide:Number = 340;
var topSide : Number = 132;
var bottomSide: Number = 332;
var topBoundary: Number = bottomSide - topSide;
var widthBoundary: Number = rightSide - leftSide;
var areaSize : Number = widthBoundary/2;
var boxCenter : Number =rightSide - areaSize;
this.onMouseMove = function() {
if (_xmouse > leftSide && _ymouse > topSide && _xmouse < rightSide && _ymouse < bottomSide) {
bounce_mc.startDrag(true);
var heightPercent = ((((_ymouse - topSide)/ topBoundary) * 100) /2) + 50;
bounce.setVolume(heightPercent);
bounce_mc._xscale = heightPercent;
bounce_mc._yscale= heightPercent;
var panValue = (( _xmouse - boxCenter) / areaSize) * 100;
bounce.setPan(panValue);
} else {
stopDrag();
}
}
} - Save the movie and test it.

Image 3: Use a square to identify the area where the ball can move and write down the positions of the top, bottom and sides of the box.
Stepping through the code
var bounce: Sound = new Sound(bounce_mc);The first thing to do is to create the sound object and set the sound in the bouncing ball movieclip as its parameter.
var leftSide:Number = 38;
var rightSide:Number = 340;
var topSide : Number = 132;
var bottomSide: Number = 332;
var topBoundary: Number = bottomSide - topSide;
var widthBoundary: Number = rightSide - leftSide;
var areaSize : Number = widthBoundary/2;
var boxCenter : Number =rightSide - areaSize;The next thing is to set the parameters for where the ball can move. We also need to know the height of the constraining area- topBoundary - its width- widthBoundary- the half way point - areaSize- and the center of the constraining area- boxCenter. These numbers will be used to set the volume of the sound and the pan value.
this.onMouseMove = function() {
if (_xmouse > leftSide && _ymouse > topSide && _xmouse < rightSide && _ymouse < bottomSide) {This conditional statement simply checks to see if the movieclip is in the bounding area.
bounce_mc.startDrag(true);If it is then it can be dragged.
var heightPercent = ((((_ymouse - topSide)/ topBoundary) * 100) /2) + 50;We then check to see how close to the top of the box we are and use that position to determine a "percentage number of where the clip is in the height of the box.
bounce.setVolume(heightPercent);
bounce_mc._xscale = heightPercent;That number is then used to set the volume of the sound and the scale perecentage of the movie clip.
bounce_mc._yscale= heightPercent;
var panValue = (( _xmouse - boxCenter) / areaSize) * 100;We do a similar calculation to determine how far from the center the movieclip is and convert that distance to a percentage value.
bounce.setPan(panValue);Then apply that number as the pan amount.
} else {
stopDrag();Of course the ball can be dragged outside of the box. If the edge is reached, then the stopDrag() action kicks in to constrain it to the top , bottom and sides of the drag area.
}
}
}
This work is licensed under a Creative Commons License.
